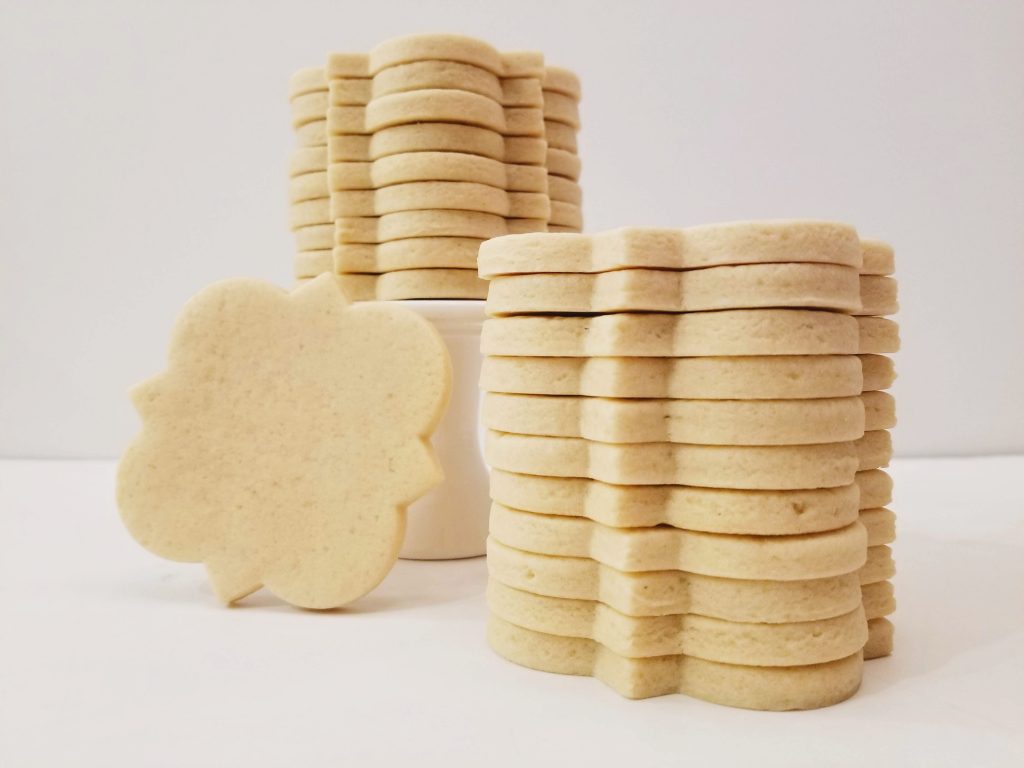
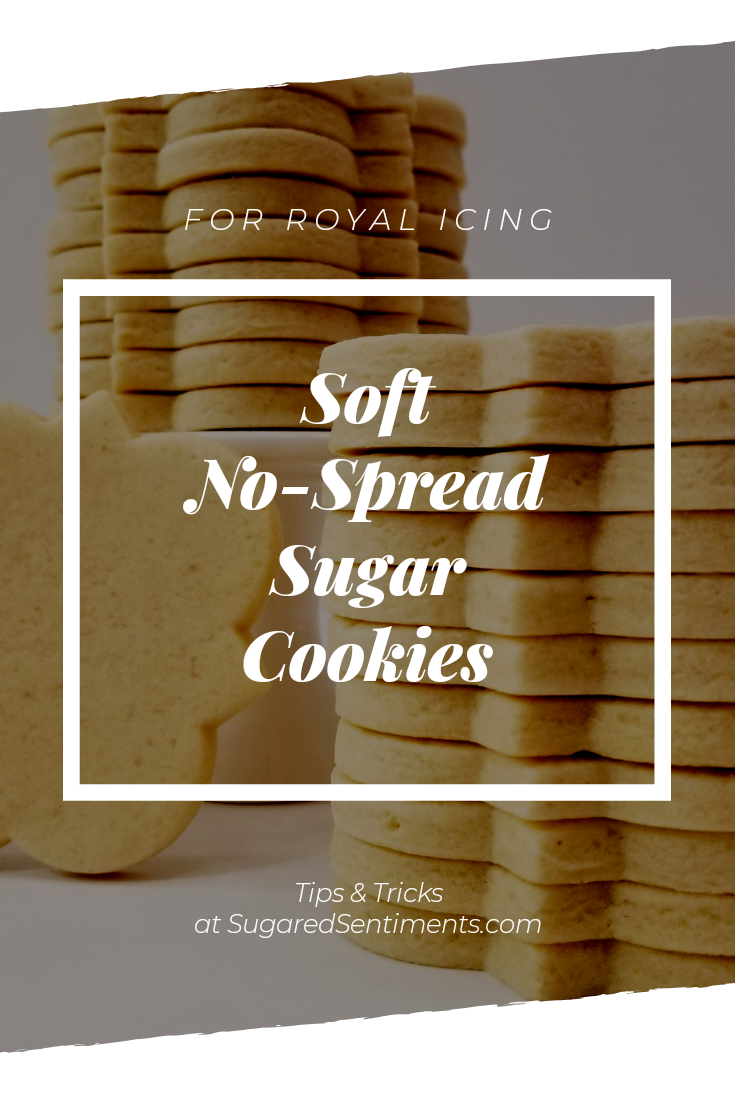
Perfect for Royal Icing, these Soft No-Spread Sugar Cookies are easy to roll out, and relatively mess free! They pack that buttery, vanilla flavor, and once decorated, remain soft for days.
Decorating with Royal Icing can be complicated and stressful without the right recipes, tools, and tips for success. This recipe for Soft No-Spread Sugar Cookies starts you off on the right foot and is the first part of a 3 part series for Royal Iced Sugar Cookies! Get my recipe for Soft Royal Icing and then head to my post on Royal Icing Consistencies for help flooding your cookies with ease!
My childhood was spent baking cookies EVERY Sunday! I vaguely remember a Sugar Cookie phase. My mom had this big wooden box full of recipe cards. (You know, before the days of Pinterest and Google!) And the recipe that created the base for these perfect cookies was always the one I came back to – even after venturing outside the recipe box! I’ve yet to find a sugar cookie recipe that I like better. Luckily for me, our family has a great arsenal of passed down recipes! And I intend to share them all with you. These Soft No-Spread Sugar Cookies are nearly identical to my Soft Roll Out Sugar Cookies. Just a small tweak to the recipe and a few extra steps after baking make them PERFECT for Royal Icing!

What I love about this recipe
First things first, one of the things I love about this recipe is the fact that I can roll them out at room temperature! I learned this technique from a class I took with Blyss Cookies! I just HAD to adjust my own recipe to be rolled the same way, because… GAME CHANGER!!! No stiff, cold, hard to roll out dough disks. No messy floury surfaces. Just ease and MESS FREE rolling!
Secondly, these Soft No-Spread Sugar Cookies really do spread VERY LITTLE. The use of baking powder instead of soda gives them just a bit of a rise, without a puff and without changing the shapes too much.
Lets get started with what you’ll need to make these deliciously tender Sugar Cookies!

What tools do you need?
- Wax Paper
- Rolling Pin with Guide Rings or Guide Strips OR Paint Stir Sticks (I recently learned that using two stacked stir sticks from the Hardware store on either side of your dough, will help you evenly roll out your dough to 3/8″ thickness! What a fun little tip from Alexcole Edible Art!)
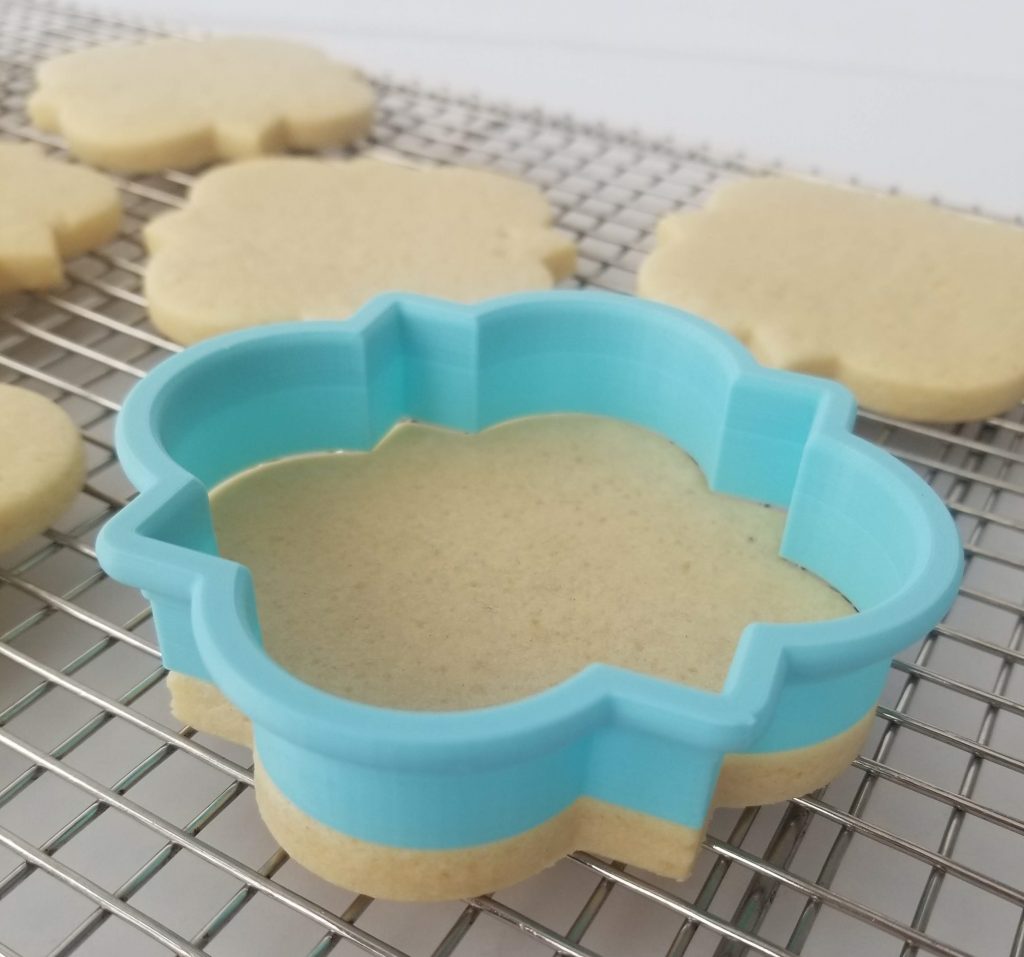
- Cookie Cutters (the one pictured throughout this post is from OquirrhMtnCookies. I love her cutters!)
- Flat Bottomed Spatula or Fondant Smoother
- Parchment Paper or Silicone Baking Mat
- Cookie Sheets
- Cooling Racks
Tips for the perfect dough
- I suggest getting all of your ingredients ready to go ahead of time. Measure out your flour, Mix your baking powder in with your milk, and make sure your butter is at room temperature.
- Scrape down the sides and bottom of your bowl after each addition. This makes sure that all of your eggs, butter and other sticky ingredients don’t remain on the bottom of the bowl, and are evenly distributed.
- Slowly add that last cup of flour. I live at a high altitude, so I need all 8 cups of flour, but you may not! You’ll know your dough is good to go when it starts to clean the sides of your bowl. If you pinch a bit with your fingers it should feel a bit like playdoh, it shouldn’t be sticky, but it shouldn’t crumble. You can always add more flour, but you can’t go back if you have added too much. So go slow!
How to roll out your dough
Depending on how thick you intend to roll your Soft No-Spread Sugar Cookies, I suggest dividing your dough into 3 equal sections. I tend to roll mine at 1/4″ thick when decorating with Royal Icing because they hold their shape a little bit better for me. But I often change my mind and want a thicker cookie as well. If you roll them at 3/8″ you can get away with 2 portions of dough!
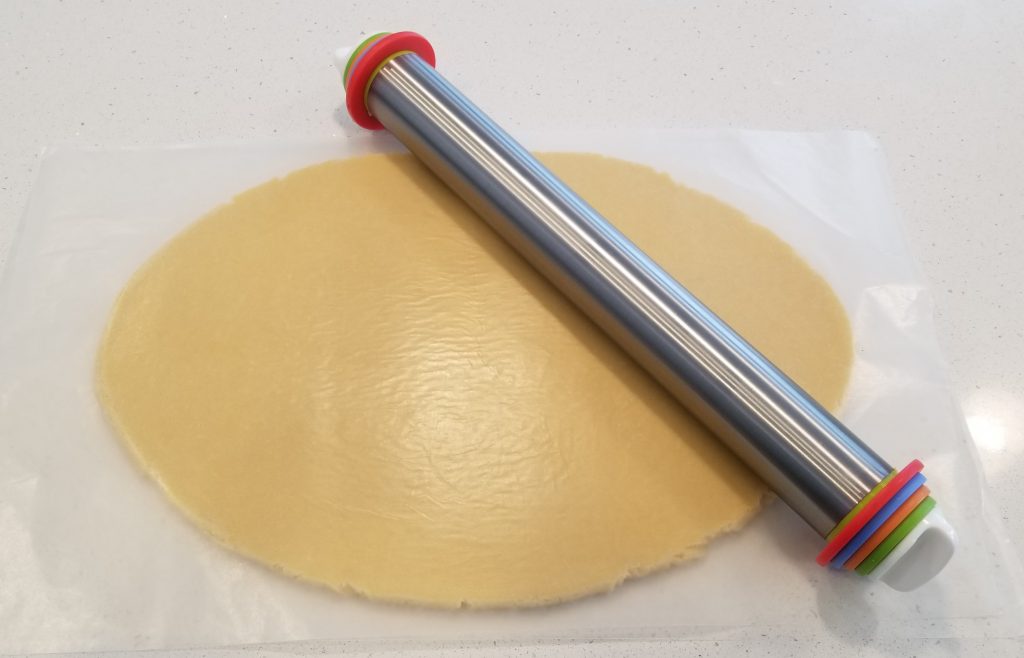
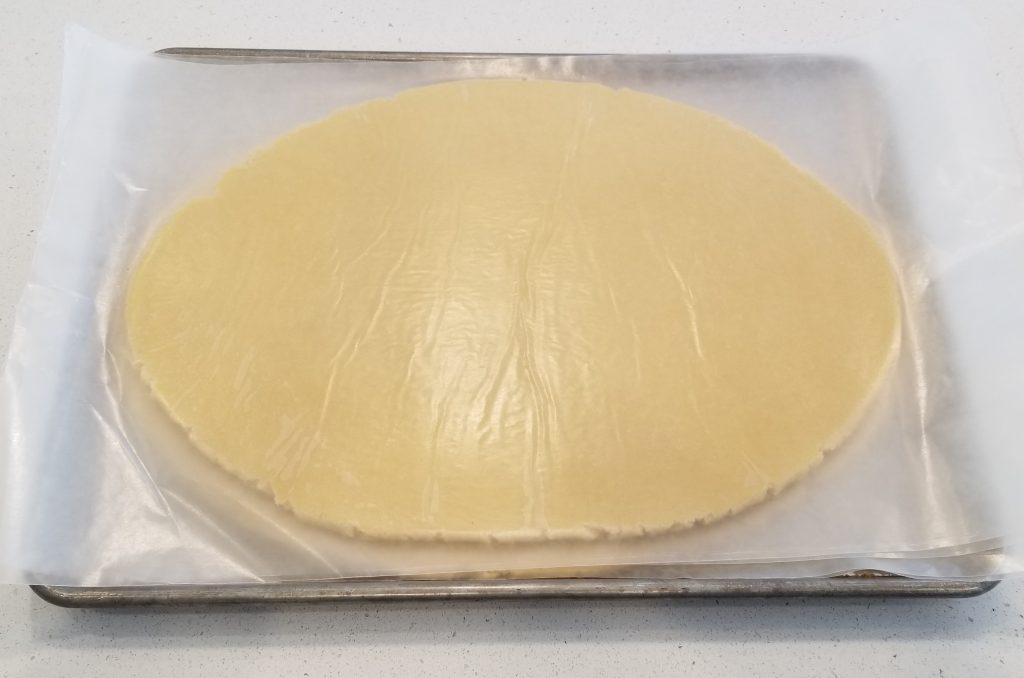
To roll each portion, place the dough in between two pieces of wax paper. If you don’t have wax paper you can also use parchment or plastic wrap. I like wax paper because it somewhat sticks to my counter top and doesn’t slide around while I’m rolling. Parchment paper doesn’t do that, and I tend to push a little to hard with my rolling pin and break through plastic wrap! But any of the 3 options will do the job!
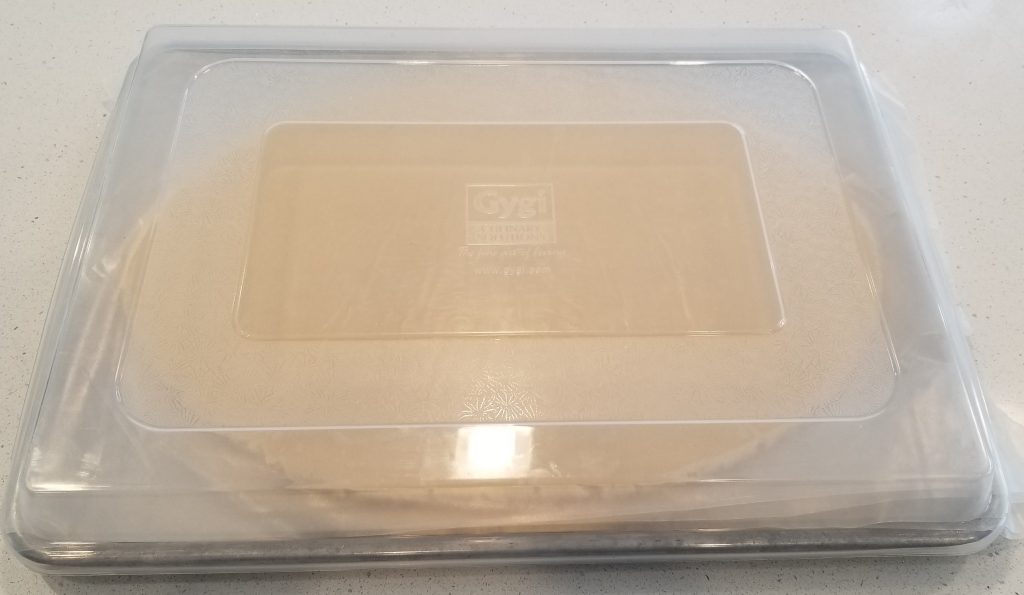
Once the portions have been rolled, place them in a container and slide them into the refrigerator for about an hour or overnight. If you are in a hurry, you can place them into the freezer for 20-30 minutes instead.
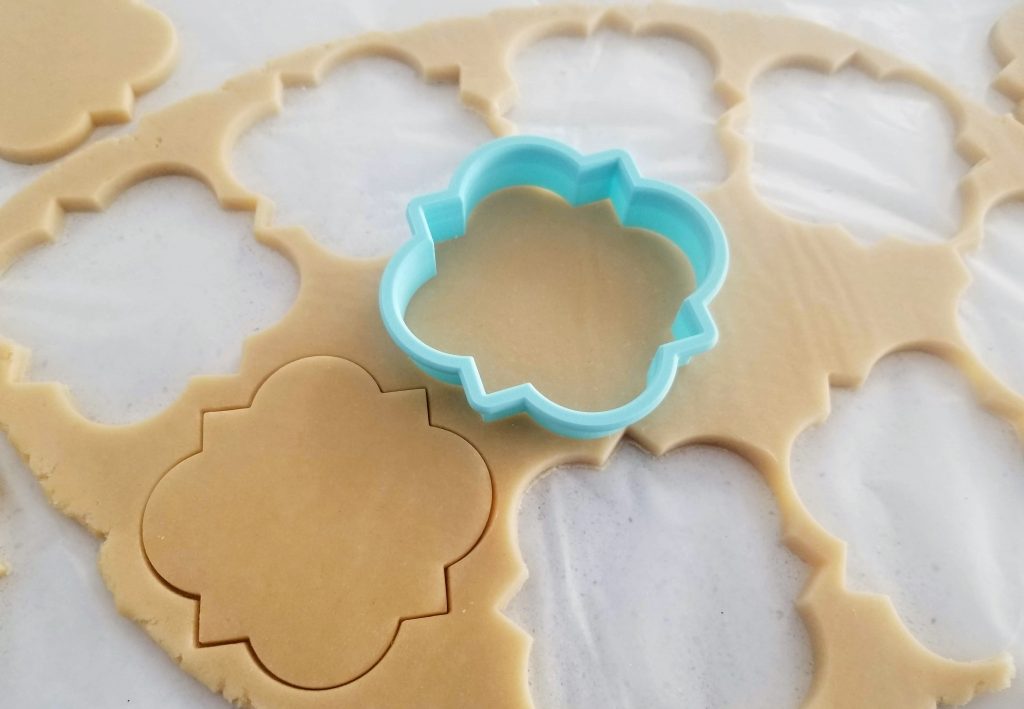
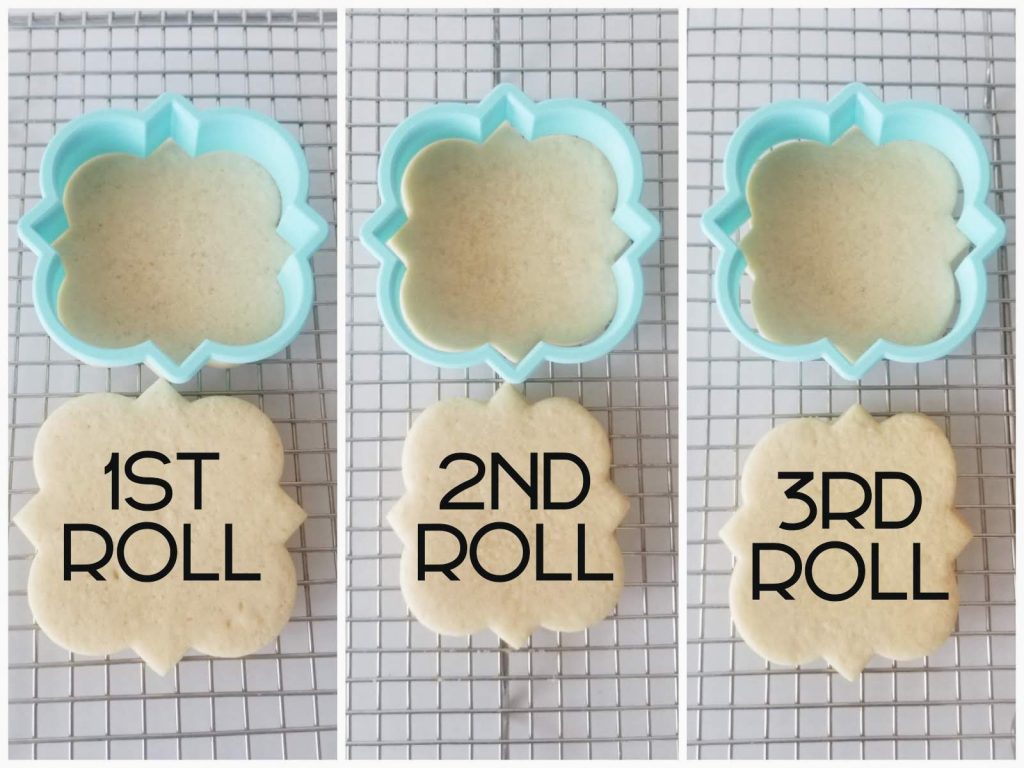
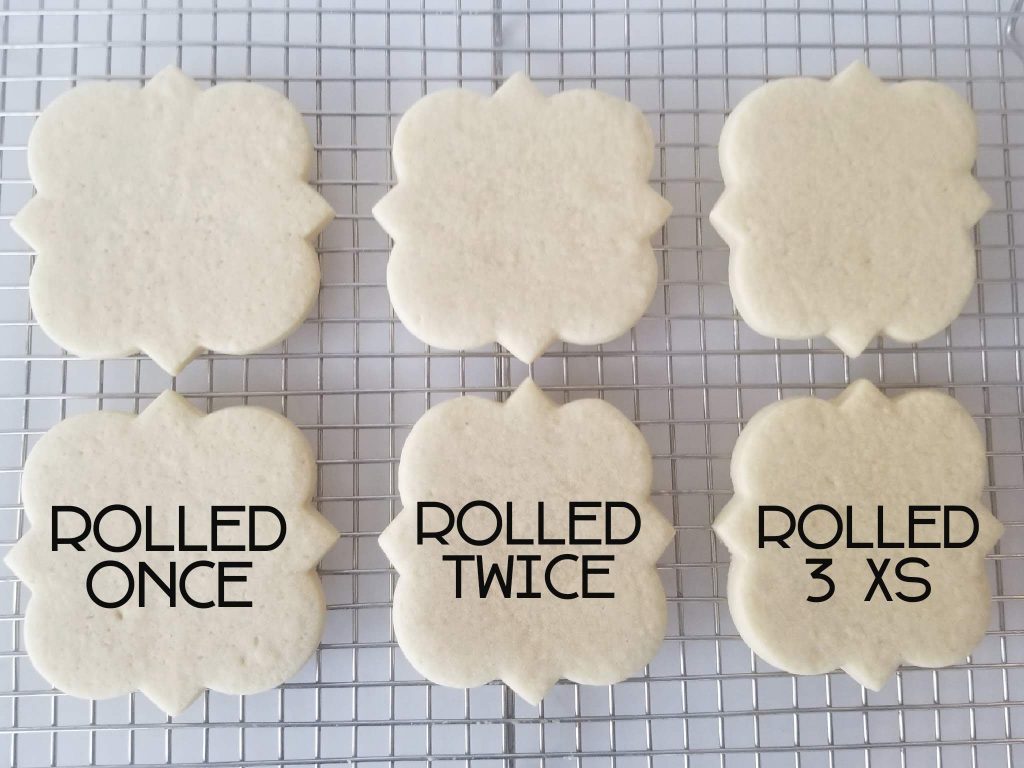
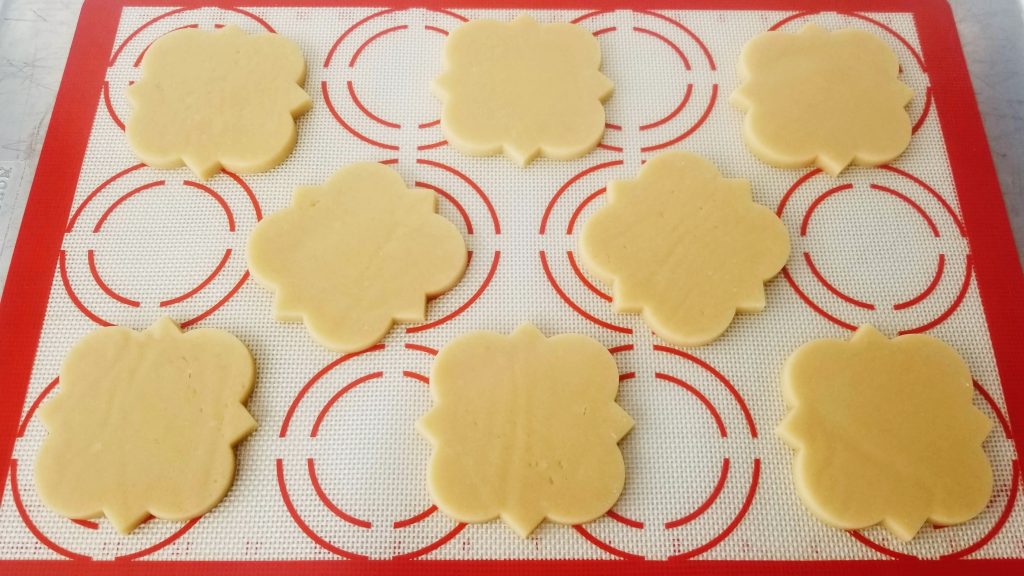
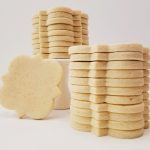
When cutting your Soft No-Spread Sugar Cookies, don’t immediately re-roll your scraps. Set them to the side, and then combine all of your scraps to re-roll together. Every time you re-roll your dough you develop your gluten, your dough gets a little more tough- creating a tougher cookie, and your shapes start to get a little wonky. I don’t typically roll my dough more than 3 times. You can see an example of what each re-rolled dough looks like baked below.
Baking the cookies
These few tips will help you have the flattest cookies possible. This helps keep your Royal Icing on the cookies. If your cookies dome, that icing will just pour off of the cookie.
Steps 1 & 2 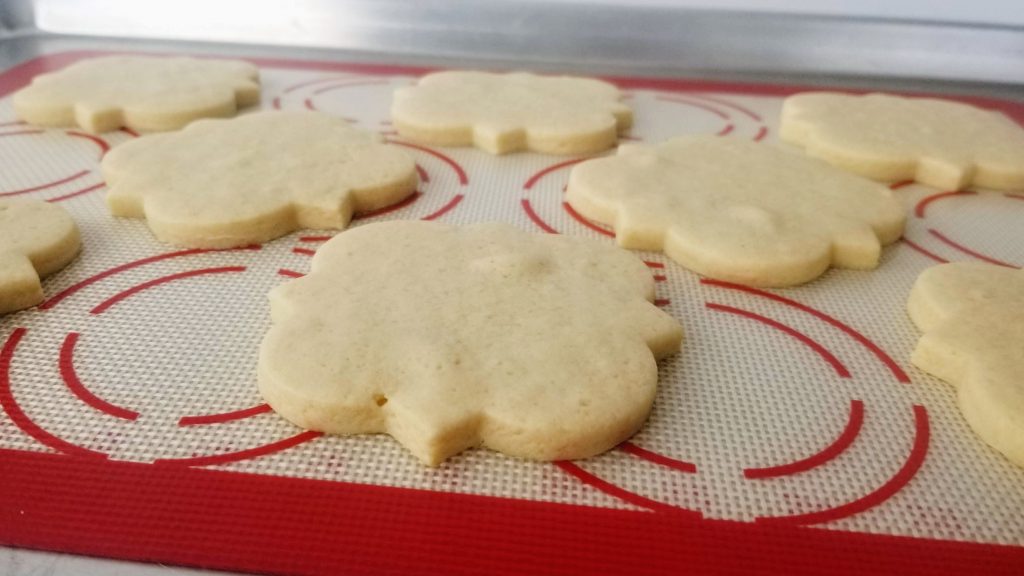
Step 3 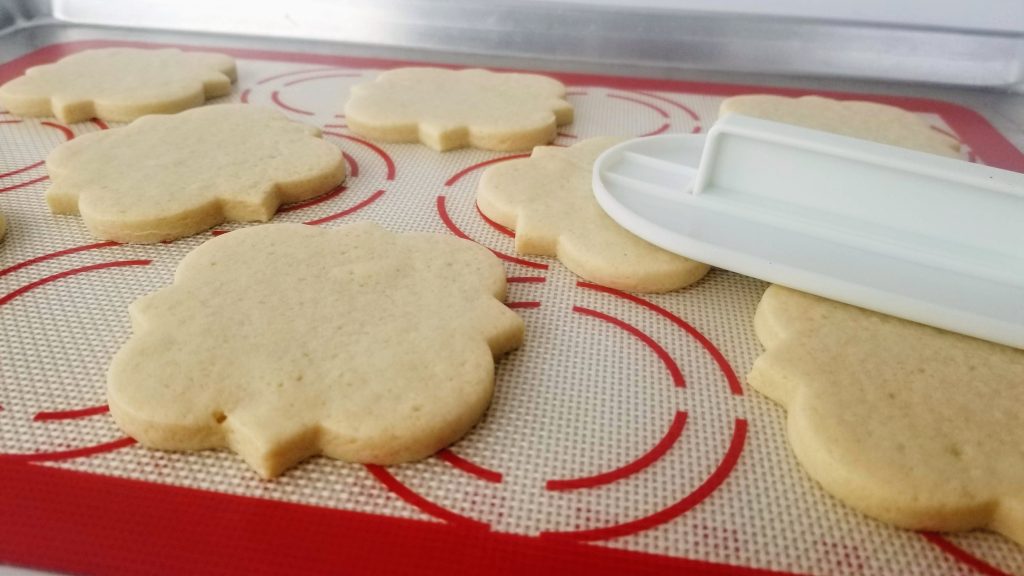
Step 4
- Place a silicone baking mat onto your cookie sheet.
- Cut your shapes and place them onto the mat. Space like-sized shapes at least an inch apart. Try to bake similar sizes on the same pan. Drastically different sizes should be baked separately or the large cookies will be doughy and the mini ones will burn.
- Bake until the edges are firmly set and the center is no longer shiny.
- Immediately after removing the cookies from the oven, use a fondant smoother or the back of a flat spatula to gently work out any air bubbles. You can do this by adding slight pressure and moving the smoother in a circular motion. I have Amanda at Cookie Concepts to thank for this tip!
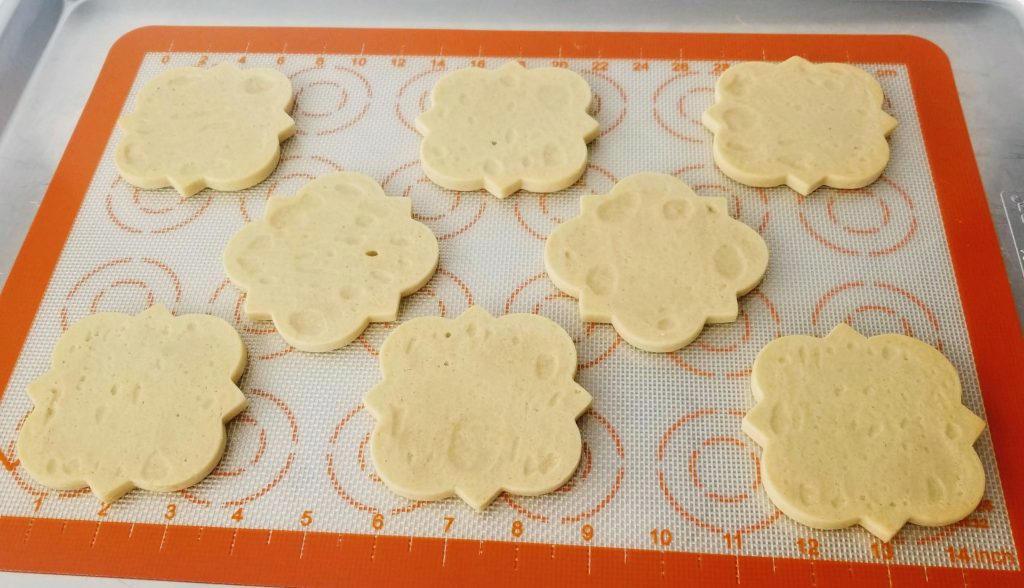
- For EXTRA flat cookies, after 2 minutes, flip each cookie upside down on the silicone sheet. Be careful not to burn your fingers or mutilate your delicate shapes. Leave them there like that for about 5 minutes and then transfer to a cooling rack.
- Also, each time you’ve re-rolled your dough, you will probably need to add an extra minute onto your bake time.
Step 5 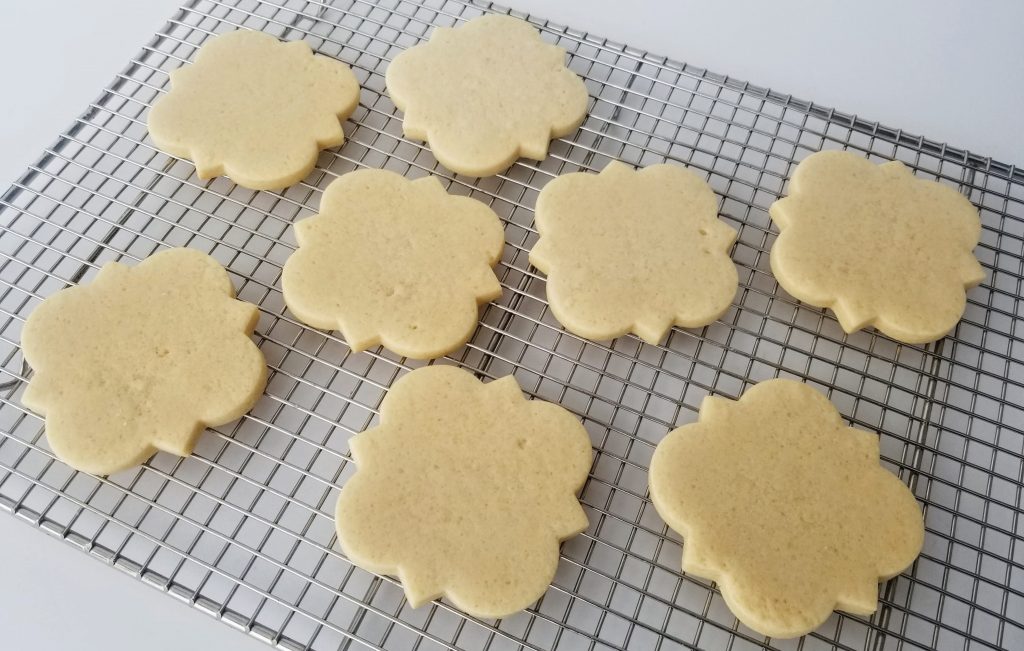
Finished FLAT Cookies
Tips and tricks
One thing that makes a big difference in preventing overflow is decorating the bottom of the cookies. It is the FLATTEST part of your cookie and you’ll end up with very few overflowing cookies! If you DO decide to decorate the bottom of your cookie, take care to make sure that you are baking any specialty (Plaques that are meant for lettering… etc) cookies upside down. That way when you flip them over to decorate they are actually face up!


Flooding sugar cookies is one of my very favorite pass times. It is very therapeutic. My goal with sharing this recipe is to give you the gift of a tried and true recipe that makes flooding that much easier! If you are just starting out, practice makes perfect… don’t expect perfection with your first try. But instead, allow yourself room to improve. Your only competition should be yourself!
Happy Baking! -Chels
Soft No-Spread Sugar Cookies
Ingredients
- 2 Cups Unsalted Butter, softened
- 2 Cups Granulated Sugar
- 1 tsp Salt
- 2 tsp Vanilla Extract
- 4 Large Eggs
- 7-8 Cups All Purpose Flour
- 1/4 tsp Baking Powder
- 1/2 Cup Milk
Instructions
- Cream butter, sugar, salt and vanilla together until light and fluffy (about 3 minutes)
- Scrape down the bottom and sides of the bowl.
- Add eggs and mix on medium speed until fully combined.
- Scrape down the bottom and sides of the bowl.
- Dissolve baking powder in milk and set aside.
- Add 4 cups of flour and mix on low until combined.
- Add milk mixture. Mix until fully incorporated.
- Add the rest of the flour one cup at a time. Go slow with the last cup of flour. (I live at a high altitude and need all 8 cups) You will know there is enough flour when the dough is playdoh like consistency. It should not be sticky, but it shouldn't crumble. The dough should clean the sides of the bowl (if using a stand mixer fitted with the paddle attachment).
- Separate your dough into 3 equal sections and roll each section in between two pieces of wax paper, parchment, or plastic wrap. Use a rolling pin with guide rings for even results.
- Place rolled sheets of dough into a container and place into the fridge for at least an hour, or overnight. Dough can also be stored stored in the freezer for 20 minutes if you are in a hurry, or stored there for later use.
- When ready to cut and bake, preheat your oven to 350° and place your oven rack in the center position.
- Cut your shapes and place onto a silicone baking mat or parchment paper (for best results). Space cookies 1-2" apart and bake for 8-15 minutes depending on size and thickness.
- When cookies are baked through, use a fondant smoother to gently press out any air bubbles and gently flip cookies upside down the mat to cool for 5 minutes. Then transfer to a wire rack to cool completely. These additional steps are optional, but will provide the flattest cookies possible. Decorate with desired icing.
- Cookies can be stored in an airtight container for up to 3 days, or in the freezer for at least 2 months.
Notes
How many cookie would you say this makes? Love your stuff!
Thank you, Carrie! It really depends on how thick you roll the dough and how big the cookie cutters are. But at least 3 dozen. 🙂
Thanks!
Just a friendly tip!
If you lightly spritz your countertop with water the parchment paper won’t shift under the dough when rolling it out. 😉
Thanks for the tip, LizKoe!
just made 87 cookies from this recipe at approximate 1cm thickness! amazing!
Awesome! If you can tell us about what size your cookies were (just an average) that might help some of the readers. Thank you for taking the time to rate the recipe and comment. I appreciate it!
I definitely need to give this recipe a try!
I hope you do, Barbara! And let me know what you think!
Best, Best, BEST cookies EVER!!! Love them! 💕
I was wondering how long the dough can be stored in the freezer. I want to make the dough and then take it to my daughter’s home a couple of days later to make with our grands. They look amazing!! Makes me want to attempt royal icing!
Hi Beth, I’ve stored the dough for up to a couple months with no issues.
Perfection!
I used this recipe along with the royal icing recipe and it was amazing. The cookies were soft and delicious. All the instructions are easy to follow and the end result was great.
I’m so glad you were pleased with the recipe and the instructions! So happy you gave it a try!
I LOVE this recipe! I did half of the recipe and made 18 3” cookies. They were so good! In the past I have not had luck with getting sugar cookies to turn out well, but I followed the instructions and they turned out perfect! They tasted great and weren’t dry or crumbly. Definitely will use this recipe again!
Wahoo! I love cookie success! Thanks so much, Liz!
These were fantastic. It’s a lot of dough though and I don’t have the best quality mixer. Because of the amount of dough I was worried that I over mixed it trying to get everything incorporated but the end result was still tender and tasty. The cookies held their shape brilliantly. My cookie thickness wasn’t perfectly uniform but the recipe was super forgiving and there wasn’t a huge variation between cookie ‘doneness’ even though some cookies were probably thicker. With so much dough, I didn’t keep rerolling to squeeze out every possible cookie and I easily ended up with three dozen cookies.
It’s pretty difficult to overmix this dough. It’s a very forgiving recipe. I’m so happy you were pleased with the results. A variation of this recipe has been in my family for years and years! Thanks for the review, Heather!!
I couldn’t find large eggs for some reason. Can I use medium eggs? Or is it better to use extra large eggs? I want to make half a batch.
You can use medium! Just decrease your flour a bit so your cookies don’t end up too dry!
One more thing – the cookies are perfect for icing or glazing. They aren’t too sweet so sugary decorations don’t make them overwhelmingly sweet. They were honestly a big hit and totally worth the time to make.
I agree! Its great to have a base that isn’t too sweet so you’re not worried about the icing overwhelming the cookie!
I live and bake in high altitude too. Do you make any other adjustments for high altitude? And if I want to substitute sour cream for the milk, would I use 1/2 cup? Thank you
All of my recipes are created for high altitude baking and shouldn’t require extra adjustment. Typically. If you want to sub sour cream you’ll just do 1/2 cup, yes. I would mix your baking powder in with your flour in this case instead of dissolving it. -Chels
SO GOOD! I’ve never made these cookies before, and they are PERFECT! so easy and delicious I want to hug you rn
Oh good! This makes me super happy!
How long can these cookies last in air tight container?
It honestly depends on how you are storing them. If they aren’t decorated, I’d say a few days. If you’re using a cream cheese or buttercream icing they’ll need to be refrigerated and can last about a week. If you’re using Royal Icing, they tend to last a little longer at room temperature as long as the air tight container is closed tightly and kept away from light and heat. Up to about 3 weeks.
how long can i leave the dough in the fridge before I bake? Im waiting on some cookie cutters that will be here in a couple days.
I usually just freeze mine until I’m ready to use it. I probably wouldn’t leave it in the fridge for more than a couple of days.
So. Good. They didn’t spread, at all, and still tasted amazing. I will make it again for sure!
Yay! I’m so happy to hear that!
I’m not sure if I did something wrong but the cookies came out tasting very flour-y and had a pasty sort of texture. I live at sea level and I did not use even all 7 cups, so Im not sure why this was the result.
I am very sorry to hear that. Typically, once the dough starts to pull away from the sides of the bowl it has enough flour. You may have to decrease the flour A LOT at sea level (as I am at 6660 feet). But I am so sorry to hear they didn’t turn out super yummy!
How long are you able to keep in freezer.. baked but not decorated?
I wouldn’t freeze them for long after they are baked, personally. Maybe a week. Instead what I would suggest is to roll out your dough, freezer bag it, and then freeze the dough. That is my preferred way to freeze- before it is baked. 🙂
i had to use like 10 cups! mine where sure runny!
There are so many factors in the recipe being accurate, I do live at a high altitude, so most of my recipes are catered for that. Most have had success with this recipe, it’s one of my highest ranking recipes, but…. even the size eggs used will make a difference. Different kinds of butter have a different amount of water. I hope you were able to salvage the recipe.
Thank you! I have always wanted to try making these and now I have! They turned out just the way you said and described. Now for the decorating part.
Your instructions were dead on and so very helpful!
So glad to hear it! YouTube has some great videos for how to pipe and flood. The only difference between my Soft Royal and a typical Royal would be working a little more quickly with wet on wet, and increasing your dry time. Other than that it’s all the same, so any quality videos you can find should help you until I can get some up myself!
There is video in my Nightmare Before Christmas Cookies that kind of shows you a peak at what it looks like to decorate with my Royal Icing. Feel Free to check that one out!
I have used this recipe for sugar cookies for YEARS. Its amazing. So yummy and pretty easy to make. They keep for a long time and can be kept in the freezer for later!
I have yet to find a better recipe! Been in my family for YEARS!!! So glad someone else has been in the loop also!
Hello! Can I decorate with royal icing and store the decorated cookies in the freezer until use? I’m making ones for my baby shower but it’s my first time and I want to get them done early so I can just pull them out the freezer later next month. Thank you!
If you use a typical Royal Icing you can. If you’re planning to use my Soft Royal Icing Recipe, you’ll experience color loss. It’s one of the few flaws the icing has.
I loved this! I kind of want to try adding almond extract though to give it a bit of a nutty flavor as well!
I’m so glad you liked them! I highly recommend that addition!! I like it as well.
can u give metric weights please – so much more accurate, and i find it hard to stuff butter in a cup – so messy! thank you
Most butter has measurements on the wrapper, but a typical stick of butter is 4oz, so two sticks equal a cup. Shoving butter into a cup WOULD be messy!! In terms of the flour, sugar, etc… I find google a great resource to tell me how many ounces make up a cup, or half cup etc.. I’ll work on adding metric weights to my next recipes!
Hello!
I am going to be making these cookies on Saturday and I am very excited to try them. They look amazing. Thank you for including all the tips and tricks.
I am wondering if it is possible to double or triple the recipe if needed?
Thank you, Chels!
Elizabeth
Sorry I’m just getting to this! Yes! You can double or triple. I always double this. Good luck!
This is now my go to recipe. After trying many recipes this is the best and everyone love them. I use it with her soft royal icing and they are absolutely perfect.I wish I could show you the pictures of the cookies I made for my daughter in law’s bridal shower, (which had to be shipped across the country) These cookies taste great and they hold up with proper storage. Excellent recipe
Thank you, Mia! I am so glad you’ve had success with this recipe. It is my absolute favorite sugar cookie recipe. You can also send pictures to my email sugaredsentiments@gmail.com. I’d love to see them!
I’m excited to try all your soft recipes. Is there any way to make these into lemon or red velvet instead of plain sugar? I would love to be able to do all three!
Hi Laci, Lemon is pretty simple and I have done that before. I typically replace half of the extract with lemon extract. Then I usually add some lemon zest to taste. (Usually the zest of one lemon is plenty as long as it’s a fairly large lemon). Red velvet would be a little more difficult to achieve with this recipe unless you just use a red velvet emulsion. I’m not a huge fan of the fake flavor that comes with most emulsions, but you could try it. Otherwise I’d just do some research for a good roll out red velvet cookie. I do have some Easy Red Velvet Sandwich Cookies on my site. They’re not roll out. But they’re tasty! Good luck!
Thank you so much!!!
I’m going to give this recipe a try today. I only have almond milk in the house but I’m thinking that should be ok for the cookie and the icing🤞
Almond milk will be a great substitute!
Have you ever experimented with using a mixture of cane sugar and powdered sugar? I’d be interested in trying a combination. Thanks!
I have not, but I do have a recipe that I have used that does use a combo. Might be worth some experimentation! Let me know if you do!
I made these today with bobs red mill 1-1 flour to make them gluten free, and they turned out amazing! I like that they aren’t too sweet so the frosting can be all sugar and isn’t overwhelming. Thank you for sharing this recipe!
Yay! I’m so happy you liked the recipe! Thanks for commenting!
How many days in advance can I make the cookies?. could i use fondant with this cookie recipe?. Thankyou
If I am making these in advance I typically make and freeze the dough. Then bake them the day before I decorate. You can totally use fondant if that is your preference.
I have added the 8 cups of flour and it is still sticky. How much more can I add before the floury taste takes over.?.?
Sounds to me like there may have been other measurements off. There shouldn’t be a need for much more flour than that. You could try rolling it out as is, sprinkling a little flour if absolutely needed!
is this recipe good for my rolling pin with a design? will it hold the design?
I’ve got to be honest… I haven’t dared try my stamped rolling pin. Only because I don’t want to clean it if it all sticks! I will say, if you are going to try, I would flour your dough pretty well. If you decide to give it a shot let me know how it turns out!
They are definitely no spread, but I agree with another commenter that they tasted super floury (I also did not use all the flour.)
My husband was very sad. I’ll try again with even less flour.
I’m sorry that you weren’t super fond of them, Jessica.
These were great. I did end up adding a 3rd egg though as the recipe was very dry. That seemed to work. I also only cooked them for 10 minutes on a seasoned stoneware. They turned out great. Do you have the nutrition information for this recipe? If not, I can plug it in to my program.
I do not, but I’m glad you were able to adjust the recipe to your taste.
Hi! I noticed recipe says store in air tight container for 3 days or freeze, does this mean cookies cannot be prepackaged and left at room temperature? I just made the recipe didn’t bake yet, I was planning on making these cookies, putting them in celephane wraps & then in an airtight container, iced and leaving at room temperature for about 2 weeks would this make the recipe spoil or the cookies taste bad?
Hi Katie, I hope you were able to figure this out. Normally I don’t recommend leaving them at room temperature for longer than a week. But that’s just my personal preference. Also, they rarely last that long!
If you were to want to add some additional flavours – say, for my purposes, chocolate/cocoa powder or cinnamon, how would you recommend incorporating these extra ingredients so they don’t change the texture of the cookie too much?
Reduce the flour by the same amount of flavoring you would be using would probably be my suggestion. Good luck!
Hi! Absolutely love your cookie and soft royal icing recipe! Can you give me a suggestion on how to freeze/store the cookies after decorated for best results?
I would like to bag them individually then freeze them, do you think that would work fine without messing up the design?
You can definitely do that, but I’ve found that the icing doesn’t really hold the color super well in the freezer. I don’t know why, but… you’ll get color spotting.
I have been using this recipe for a long time and just came to revisit because I’m running into some issues! But Rereading your explanation of the process has solved a lot of issues!
I am wondering though, when you freeze the dough ahead of time do you let it thaw in the fridge first before cutting out and baking? Or immediately just cut out the frozen dough and bake?
I cut and bake straight from frozen, but by the time they’re on the pan and going into the oven the dough is usually thawed, just cold.
Hello, I was just wondering how long I can store them for after baked! Same with decorated for royal icing!
It really depends on how they are stored, Gailin. If they’re sealed, about a week after decoration. When baked, but not decorated, I’d say a few days before they’ll lose a lot of moisture.
I love this recipe, but my cookies seemed to spread quite a bit and lose there sharp a little and it were not flat at all I I think I rolled a them out, pretty flat, but is there anything you think that could have gone wrong?
Probably not quite enough flour. The dough should clean the bowl of your stand mixer if it’s ready. But without being there, a number of things could have been off… Even climate can have a part to play with the amount of flour needed.
Have you ever substituted margarine for the butter? If so does it still hold shape?
I’m a firm no margarine user! Sorry!
How do you defrost the dough after freezing?
Let it sit on the counter for 10 minutes or so and it will be ready to cut.
I need clarification: You say that one thing you love most about these cookies is that you can roll them out at room temperature. Then in the directions you say to chill the dough. So I’m confused. What’s the best way to make these cookies? Thanks for any tips!
Roll them out first and then chill the rolled out dough 🙂
The cookies were great for rolling and holding their shape, but I did not think they were sweet enough. Can you add more sugar without causing spreading? Also, do they normally cook all the way through? I cooked my longer, but some of them were not done in the center. I’d like to try them again. Thanks!
So the reason I like these sugar cookies is because the base isn’t super sweet and therefore allows for a sweeter frosting. But if you’re looking for a sweeter base, I’d probably try a different recipe. Baking is science, if you add more sugar, chances are you’ll throw off your recipe and they will spread, or bubble, or burn. And depending on how thick you roll them out, they definitely will have a harder time cooking through. I roll mine 1/4 inch to 1/2 inch and have no problems.
Linda,
I had the same experience today. I typically roll out at 3/8″ but tried it at 1/4″ today. I was afraid of over-baking since the were a thinner cookie than I typically bake. I kept adding time but still didn’t seem cooked. I, too, wondered what I did wrong, if anything.
I wonder if maybe just the difference in butter (water content) or size of eggs (my recipes are all catered to large eggs) is possibly making a difference for you both? I have had hundreds of positive comments on this recipe, its strange that you have both had issues. I’d like to try and help you figure it out, but it’s so difficult to know what is causing the issue.
I just made this dough, rolled it out, and put it in the fridge. I don’t know what the difference is between this recipe and the dozens and dozens of other sugar cookies I’ve made, but this was the EASIEST dough I’ve ever worked with. Rolling it out before chilling it was a game-changer. I’ll be baking these tomorrow, so finger’s crossed that the cookies are as good as the prep!
Yay! I’m so happy! Rolling out before chilling really is a game changer. I hope they worked out well for you.
First recipe that actually doesnt spread!!! Thank you! ♥️
Love that! Thanks, Anna!
I made these cookies and also the soft bite royal icing. Delicious! I only used white coloring and did an edible transfer onto the cookie. Today they were perfect! Soft bite cookie and icing- not too sweet and definitely a nice soft bite! Thanks for sharing your recipes. I will definitely be making these again.
Oh good! Thanks, Robin.
You mentioned decorating the back of the cookie. What do you mean by that? Do you cut the cookies then flip them before baking, so the bottom becomes the top, then decorate as is? Or do you bake them as normal then flip and decorate the bottom? Or something else? Super interested in this idea. Thanks!
I bake them, then flip them over and decorate the bottom instead of the top. The edges are typically more defined and I lose less icing over the edge of the cookie this way.
Doesn’t work. Followed everything exactly, left cookies in for 20 minutes and they were still raw and doughy inside. repeated the recipe but didn’t follow your steps or exact measurements and they came out phenomenal. oh. and no cooking time? biggest middle finger. thanks.
I’m sorry you had problems, Cherry. There is a recommended cook time of 13 minutes listed on the recipe with variations of about 8-15 minutes. I’m not sure how that was missed? This is one of my most popular recipes, sounds like you possibly had a problem with your oven, 20 minutes is far past the recommended time. Good luck with all your baking endeavors.
This cookie recipe worked perfectly for the rainbow cookies I made. I did add a little extra flour to get it to the consistency like PlayDoh. Your instructions were very helpful and easy to follow. Rolling out the dough and refrigerating it worked great! Very minimal mess and the cookies didn’t spread during baking. Thank you for sharing!
So happy you liked them!
I have made this recipe for a few years now and I just want to say these cookies are just 5 star in every way. The rolling out process without the flour mess is genius, (try it with gingerbread too!) all the tips make for perfect cookies, and they taste amazing once frosted. I always use Wilton Royal icing (but I add vanilla for taste 🙂 because I always need to freeze my cookies, so I haven’t tried your soft version due to the possible color loss. Huge thanks to you for sharing such a great cookie recipe!
Thanks so much, Steph! I’m so glad you like them. (And yes, one downfall of the soft royal icing. It is BOMB though, hopefully you’ll try it one day!)
I am curious how you do royal icing decorating if they can only be stored up to 3 days in an airtight container? New to royal icing decorating and it seems to take 3 days just to have everything completed 😅
That is just the internet’s recommendation for storage. I do like to individually wrap mine AND place them in a container if they won’t be eaten for a few days. It keeps them more fresh. But I’m with you, a complex order takes me 2-3 days to decorate, and I leave them exposed during the process! if in sealed bags after they have completely set, mine have remained fresh for 2 weeks. I just can’t “health wise” recommend this.
Am I able to just mix up dough and put in covered container in refrigerator overnight and roll out in the morning?
Yes, that’s how typical dough is rolled out, its just harder to roll out cold- and why I love this method!
Is it possible to cut the chilled dough, then freeze the cutout shapes? Then bake from frozen?
Should be able to do that, you’ll probably want to extend your bake time if you bake straight from frozen.
I make half this recipe because my bowl isn’t as big. But it works out perfectly. I have gotten so many compliments on these cookies!
I’m so glad you’re enjoying them, Amanda!
This is the best recipe for no spread sugar cookies! I’ve used it more time than I can count and the cookies always come out perfect. Until this last time, they didn’t hold shape when baking and they poofed up…what did I do wrong?
Sounds like probably a miscalculation, but it could be anything, honestly. I’ve noticed a pretty drastic difference in my recipes over the last couple of years with inflation, I think companies are changing their ratios in ingredients to save money and cut costs, and it can throw off your recipe. Butter seems to be the culprit for me lately.